Custom Controls in the BlueBot Controller App: The BlueBot Controller App is a comprehensive mobile application designed for seamless control of Bluetooth-enabled devices such as LEDs, robots, and sensors. Whether you’re a hobbyist, student, or developer, this app brings versatility and ease to controlling your projects with various types of controllers. One standout feature of the BlueBot Controller App is the Custom Control, which lets you design your own buttons, giving you the flexibility to add or remove controls as needed for specific tasks.
This article will explore how Custom Controls work within the BlueBot Controller App, how you can use them to customize your project interface, and how they enhance device management with Bluetooth technology.
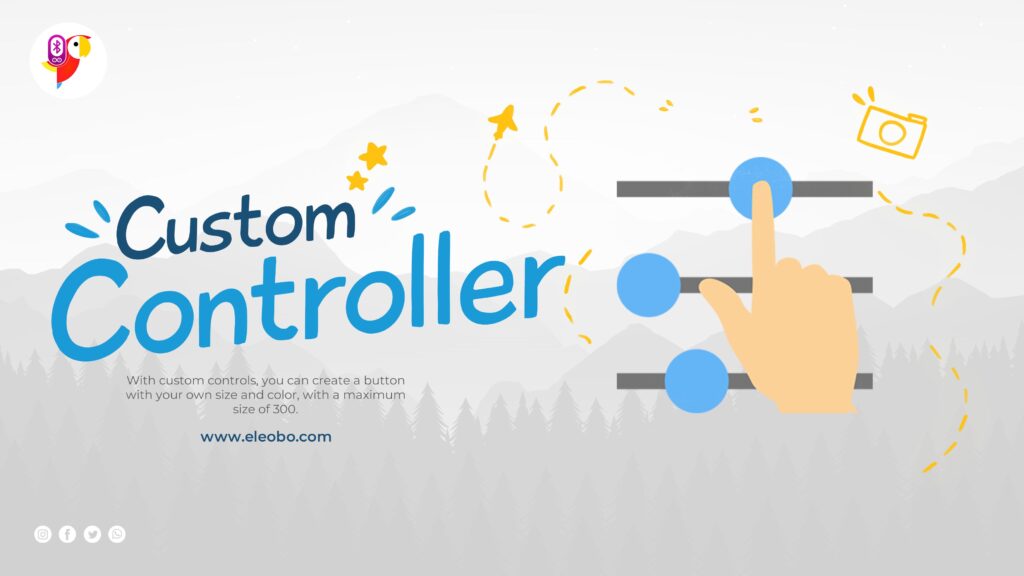
Table of Contents
What is the BlueBot Controller App?
The Ultimate Bluetooth LED Controller App is a mobile application designed to control Bluetooth-enabled devices. The Blue Bot Controller is an all-in-one Bluetooth app designed for controlling devices like LEDs, robots, and sensors. It offers advanced features tailored for hobbyists, students, and developers alike.
With support for gesture, voice, IoT, and custom controls, the app enables seamless device management. Its user-friendly interface makes exploring wireless communication and automation effortless and engaging for all users.
Controllers:
- LED Control
- Robot Control
- RGB Control
- Text Control
- IoT Control
- Matrix Control
- Voice Control
- Gesture Control
- Sensor Control
- MPU6050 Sensor : Gesture and motion detection.
- Potentiometer Sensor: Analog value adjustments.
- PIR Sensor: Motion detection triggering.
- Ultrasonic Sensor: Distance and proximity measurements.
- Custom Control
- Timed Control
- Servo Control
- Joystick Control
- Inauguration Control
Features of the BlueBot Controller App
- Simple Command Interface: Easily send commands like “ON” and “OFF” to control devices.
- Customizable Buttons: Create custom commands to suit your project needs.
- Real-Time Control: Instantly see the results of your actions.
- Compatibility: Works seamlessly with Arduino and Bluetooth modules like HC-05 and HC-06.
How to Download the BlueBot Controller App
To get started, download the BlueBot Controller App from the official source:
Make sure you have a Bluetooth-enabled smartphone to pair with your project.
Custom Controls: Tailored Buttons to Fit Your Needs
The Custom Control feature in the BlueBot Controller App is a game-changer for users who want more flexibility and personalization. With this feature, users can create buttons according to their project needs—whether for controlling LEDs, robots, or other connected devices.
Key Features of Custom Controls:
- Create Custom Buttons: Users can design buttons that suit their specific requirements. These buttons can be customized in terms of size, shape, color, and even labels. For example, a user can create a button of their desired size, with a specific background color and text label.
- Add or Remove Buttons: Users have the freedom to add more buttons when they need additional controls or remove unwanted buttons, thus simplifying the interface. This is particularly useful in projects where the number of controls may change over time, such as controlling different components or devices.
- Set Your Own Commands: Each button created with Custom Control can be assigned a specific command. These commands can correspond to actions like turning an LED on or off, sending signals to a robot, or interacting with sensors. By assigning custom commands, users ensure that the interface is directly linked to their project’s requirements.
- Choose Colors for Buttons: Aesthetic customization is made easy with the option to choose the colors of the buttons. Whether it’s to match a project’s theme or simply to create more intuitive buttons (e.g., green for “ON,” red for “OFF”), the ability to personalize button colors enhances the user experience.
- Maximize Interface Efficiency: Custom controls allow users to declutter their interface by adding only the controls they actually need. For example, if a user does not require a joystick control for their project, they can opt to exclude it, thereby making the interface simpler and more intuitive.
How to Use Custom Controls in the BlueBot Controller App
Let’s walk through how users can create and use Custom Controls in the BlueBot Controller App.
Step 1: Launch the App
Open the BlueBot Controller App and navigate to the “Custom Control” section from the main menu. Here, you will find options to create new controls, modify existing ones, and set their actions.
Step 2: Create a Custom Button
To create a custom button, tap on the “Add Button” option. You’ll be prompted to enter the following details:
- Button Size: Set the width and height of your button.
- Button Color: Choose the background color and text color for your button.
- Button Label: Name your button (e.g., “Turn LED ON”).
- Command: Assign a Bluetooth command that the button will send when pressed (e.g., “ON”, “OFF”, “F”, “B”, etc.).
Step 3: Add More Controls
If you need additional buttons, sliders, or switches, you can continue adding them from the same interface. For example, you can add a button to control a robot or another to activate a sensor.
Step 4: Test and Connect
Once you’ve added the necessary controls, you can pair your mobile device with your Bluetooth-enabled project (e.g., an Arduino with an HC-05 module) and start using your custom buttons in real-time. The app allows you to instantly send commands and receive feedback from your device, making the process of controlling your project smooth and interactive.
Example: Custom Controls for LED and Robot Control
In an example project, you might use Custom Controls to control both LEDs and a robot. Here’s how you could set up your controls:
- LED Control:
- Create two custom buttons: “Turn LED 1 ON” and “Turn LED 2 OFF”.
- Assign the commands “F” and “B” to the respective buttons.
- Robot Control:
- Add a joystick control or two custom buttons for controlling a robot’s movement (e.g., “Move Forward” and “Turn Left”).
- Assign the appropriate commands to each button (e.g., “F” for forward and “L” for left).
With Custom Controls, you can now control both the LEDs and the robot independently from a single, personalized interface.
Sample Code: Arduino Bluetooth Robot Control
Below is an example of how you can integrate the BlueBot Controller App with an Arduino-based Bluetooth-controlled robot. This sample code uses the SoftwareSerial library to communicate with the HC-05 Bluetooth module and control the movement of the robot.
#include <SoftwareSerial.h>

// Set up Bluetooth serial communication
SoftwareSerial btSerial(2, 3);  // RX, TX pins for Bluetooth module (e.g., HC-05)

// Define pins for controlling motors or any other output devices
const int motorLeftPin = 4;   // Pin for controlling left motor
const int motorRightPin = 5;  // Pin for controlling right motor
const int motorForwardPin = 6;  // Pin for controlling forward movement
const int motorBackwardPin = 7;  // Pin for controlling backward movement

void setup() {
  // Start Bluetooth serial communication
  btSerial.begin(9600);

  // Initialize motor control pins as OUTPUT
  pinMode(motorLeftPin, OUTPUT);
  pinMode(motorRightPin, OUTPUT);
  pinMode(motorForwardPin, OUTPUT);
  pinMode(motorBackwardPin, OUTPUT);

  // Print a message to let the user know the device is ready
  Serial.begin(9600);
  Serial.println("Arduino Bluetooth Gesture Control Ready");
}

void loop() {
  if (btSerial.available()) {
    // Read the incoming Bluetooth command
    char command = btSerial.read();

    // Print the received command to the serial monitor for debugging
    Serial.print("Received command: ");
    Serial.println(command);

    // Perform actions based on the received command
    switch (command) {
      case 'L': // Move Left
        moveLeft();
        break;
      case 'R': // Move Right
        moveRight();
        break;
      case 'F': // Move Forward
        moveForward();
        break;
      case 'B': // Move Backward
        moveBackward();
        break;
      case 'S': // Stop
        stopMovement();
        break;
      default:
        Serial.println("Unknown command");
        break;
    }
  }
}

void moveLeft() {
  // Example movement logic for moving left
  digitalWrite(motorLeftPin, HIGH);
  digitalWrite(motorRightPin, LOW);
  digitalWrite(motorForwardPin, LOW);
  digitalWrite(motorBackwardPin, HIGH);
  Serial.println("Moving Left");
}

void moveRight() {
  // Example movement logic for moving right
  digitalWrite(motorLeftPin, LOW);
  digitalWrite(motorRightPin, HIGH);
  digitalWrite(motorForwardPin, HIGH);
  digitalWrite(motorBackwardPin, LOW);
  Serial.println("Moving Right");
}

void moveForward() {
  // Example movement logic for moving forward
  digitalWrite(motorLeftPin, LOW);
  digitalWrite(motorRightPin, HIGH);
  digitalWrite(motorForwardPin, LOW);
  digitalWrite(motorBackwardPin, HIGH);
  Serial.println("Moving Forward");
}

void moveBackward() {
  // Example movement logic for moving backward
  digitalWrite(motorLeftPin, HIGH);
  digitalWrite(motorRightPin, LOW);
  digitalWrite(motorForwardPin, HIGH);
  digitalWrite(motorBackwardPin, LOW);
  Serial.println("Moving Backward");
}

void stopMovement() {
  // Stop all motors
  digitalWrite(motorLeftPin, LOW);
  digitalWrite(motorRightPin, LOW);
  digitalWrite(motorForwardPin, LOW);
  digitalWrite(motorBackwardPin, LOW);
  Serial.println("Stop Movement");
}
Explanation:
- This code allows you to control a robot using the Bluetooth commands sent from the BlueBot Controller App.
- It defines the pins for motor control and uses the SoftwareSerial library to communicate with the HC-05 Bluetooth module.
- The commands “L”, “R”, “F”, “B”, and “S” correspond to different actions for moving the robot left, right, forward, backward, or stopping.
Sample Code: Arduino Bluetooth LED Control
#include <SoftwareSerial.h>

SoftwareSerial BTSerial(2, 3); // RX, TX pins for the Bluetooth module (HC-05)

int ledPin = 13; // Pin where the LED is connected
int ledPin2 = 12; // Pin where the second LED is connected (for demonstration)

void setup() {
  // Start serial communication with Bluetooth and monitor
  BTSerial.begin(9600);  // HC-05 communication at 9600 baud rate
  Serial.begin(9600);    // Serial monitor at 9600 baud rate
  pinMode(ledPin, OUTPUT); // Set LED pin as output
  pinMode(ledPin2, OUTPUT); // Set second LED pin as output
  Serial.println("Ready to receive commands");
}

void loop() {
  if (BTSerial.available()) {
    // Read the incoming Bluetooth data
    String command = BTSerial.readStringUntil('\n'); // Read until newline character
    Serial.println("Command received: " + command); // Display the received command

    // Control the LEDs based on the command
    if (command == "F") {
      digitalWrite(ledPin, HIGH); // Turn LED 1 on
    } else if (command == "B") {
      digitalWrite(ledPin, LOW);  // Turn LED 1 off
    } else if (command == "L") {
      digitalWrite(ledPin2, HIGH); // Turn LED 2 on
    } else if (command == "R") {
      digitalWrite(ledPin2, LOW);  // Turn LED 2 off
    } else {
      BTSerial.println("Unknown command");
    }
  }
}
Conclusion
With the Custom Control feature in the BlueBot Controller App, you can design a personalized interface to control your Bluetooth-enabled devices in any way you choose. From LEDs to robots, the app gives you the flexibility to create, modify, and control various aspects of your project with ease.
Whether you’re building a complex robot or a simple LED control system, the Custom Control feature ensures that you have complete control at your fingertips. Try it out today and take your projects to the next level with the BlueBot Controller App!
Download BlueBot Controller App and start your journey today!