Are you ready to dive into the world of robotics and create your very own Arduino Bluetooth Control Car? This project is not only fun but also a fantastic way to learn about Arduino programming, motor control, and Bluetooth communication. By the end of this guide, you’ll have a fully functional car that you can control wirelessly using your smartphone, complete with front and back lights for added realism.
The Arduino Bluetooth Control Car is powered by the Arduino UNO, L293D Motor Driver, and HC-05 Bluetooth module. Whether you’re a beginner or an experienced maker, this project will challenge your skills and spark your creativity. Let’s get started!
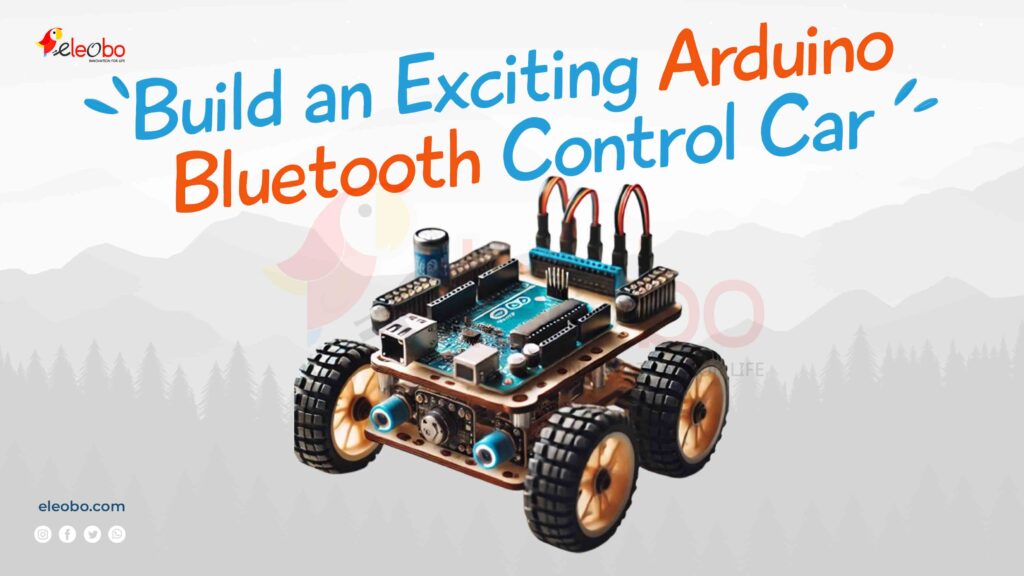
Table of Contents
Components Needed
Before we dive into the build, let’s gather all the components required for the Arduino Bluetooth Control Car:
- Arduino UNO – The brain of the car.
- L293D Motor Driver – Controls the motors.
- HC-05 Bluetooth Module – Enables wireless communication.
- DC Motors (4x) – For movement.
- Chassis and Wheels – The body of the car.
- Front Lights (LEDs) – For headlights.
- Back Lights (LEDs) – For brake and reverse lights.
- Battery Pack – To power the car.
- Jumper Wires and Breadboard – For connections.
- Resistors (220Ω) – For LEDs.
Step 1: Assembling the Chassis
First, let’s assemble the chassis of the Arduino Bluetooth Control Car. Attach the four DC motors to the chassis and secure the wheels. Ensure the motors are firmly fixed to avoid wobbling during movement.
Next, connect the motors to the L293D Motor Driver. The L293D will act as an interface between the Arduino and the motors, allowing the Arduino to control the speed and direction of each motor.
Step 2: Wiring the Components
Now, let’s wire up the components. Follow these steps:
- Connect the Motors to L293D:
- Connect Motor 1 to Output 1 and Output 2 of the L293D.
- Connect Motor 2 to Output 3 and Output 4.
- Connect Motor 3 to Output 1 and Output 2 of the second L293D (if using two drivers).
- Connect Motor 4 to Output 3 and Output 4 of the second L293D.
- Connect the L293D to Arduino:
- Connect the Input pins of the L293D to the digital pins of the Arduino (e.g., D2, D3, D4, D5).
- Connect the Enable pins of the L293D to PWM pins on the Arduino (e.g., D6, D9) to control motor speed.
- Connect the HC-05 Bluetooth Module:
- Connect the TX pin of the HC-05 to the RX pin of the Arduino.
- Connect the RX pin of the HC-05 to the TX pin of the Arduino.
- Connect the VCC and GND pins to the 5V and GND pins on the Arduino.
- Connect the Lights and Horn:
- Connect the front lights to pin A0.
- Connect the brake lights to pin A1.
- Connect the reverse lights to pin A2.
- Connect the horn to pin A3.
Step 3: Writing the Code
The code for the Arduino Bluetooth Control Car is the heart of the project. It defines how the car responds to Bluetooth commands. Below is the complete code:
#include <AFMotor.h>

// Initialize motors
AF_DCMotor motor1(1, MOTOR12_1KHZ);
AF_DCMotor motor2(2, MOTOR12_1KHZ);
AF_DCMotor motor3(3, MOTOR34_1KHZ);
AF_DCMotor motor4(4, MOTOR34_1KHZ);

// Define pins for lights and horn
const int FRONT_LIGHTS_PIN = A0;
const int BRAKE_LIGHTS_PIN = A1;
const int REVERSE_LIGHTS_PIN = A2;
const int HORN_PIN = A3;

// Variables
int command;
int speedValue = 255;
bool frontLightsOn = false;

void setup() {
    Serial.begin(9600); // Set baud rate for Bluetooth communication

    // Initialize light and horn pins as outputs
    pinMode(FRONT_LIGHTS_PIN, OUTPUT);
    pinMode(BRAKE_LIGHTS_PIN, OUTPUT);
    pinMode(REVERSE_LIGHTS_PIN, OUTPUT);
    pinMode(HORN_PIN, OUTPUT);

    // Initially turn off all lights and horn
    digitalWrite(FRONT_LIGHTS_PIN, LOW);
    digitalWrite(BRAKE_LIGHTS_PIN, LOW);
    digitalWrite(REVERSE_LIGHTS_PIN, LOW);
    digitalWrite(HORN_PIN, LOW);
}

void loop() {
    if (Serial.available() > 0) {
        command = Serial.read();
        stopMotors(); // Initialize with motors stopped

        switch (command) {
            case 'F': moveForward(); break;
            case 'B': moveBackward(); break;
            case 'L': turnLeft(); break;
            case 'R': turnRight(); break;
            case 'I': moveTopRight(); break;
            case 'J': moveTopLeft(); break;
            case 'K': moveBottomRight(); break;
            case 'M': moveBottomLeft(); break;
            case 'T': stopMotors(); break;
            case 'W': toggleFrontLights(); break; // W for front lights (White)
            case 'H': soundHorn(); break;         // H for Horn
        }
    }
}

// Movement Functions
void moveForward() {
    setMotorSpeed(FORWARD, FORWARD, FORWARD, FORWARD);
    digitalWrite(BRAKE_LIGHTS_PIN, LOW);
    digitalWrite(REVERSE_LIGHTS_PIN, LOW);
}

void moveBackward() {
    setMotorSpeed(BACKWARD, BACKWARD, BACKWARD, BACKWARD);
    digitalWrite(BRAKE_LIGHTS_PIN, LOW);
    digitalWrite(REVERSE_LIGHTS_PIN, HIGH);
}

void turnLeft() {
    setMotorSpeed(BACKWARD, BACKWARD, FORWARD, FORWARD);
    digitalWrite(BRAKE_LIGHTS_PIN, HIGH);
    digitalWrite(REVERSE_LIGHTS_PIN, LOW);
}

void turnRight() {
    setMotorSpeed(FORWARD, FORWARD, BACKWARD, BACKWARD);
    digitalWrite(BRAKE_LIGHTS_PIN, HIGH);
    digitalWrite(REVERSE_LIGHTS_PIN, LOW);
}

void moveTopLeft() {
    setMotorSpeed(FORWARD, FORWARD, FORWARD / 3, FORWARD / 3);
    digitalWrite(BRAKE_LIGHTS_PIN, LOW);
    digitalWrite(REVERSE_LIGHTS_PIN, LOW);
}

void moveTopRight() {
    setMotorSpeed(FORWARD / 3, FORWARD / 3, FORWARD, FORWARD);
    digitalWrite(BRAKE_LIGHTS_PIN, LOW);
    digitalWrite(REVERSE_LIGHTS_PIN, LOW);
}

void moveBottomLeft() {
    setMotorSpeed(BACKWARD, BACKWARD, BACKWARD / 3, BACKWARD / 3);
    digitalWrite(BRAKE_LIGHTS_PIN, LOW);
    digitalWrite(REVERSE_LIGHTS_PIN, HIGH);
}

void moveBottomRight() {
    setMotorSpeed(BACKWARD / 3, BACKWARD / 3, BACKWARD, BACKWARD);
    digitalWrite(BRAKE_LIGHTS_PIN, LOW);
    digitalWrite(REVERSE_LIGHTS_PIN, HIGH);
}

void stopMotors() {
    setMotorSpeed(RELEASE, RELEASE, RELEASE, RELEASE);
    digitalWrite(BRAKE_LIGHTS_PIN, HIGH);  // Brake lights on when stopped
    digitalWrite(REVERSE_LIGHTS_PIN, LOW);
}

void setMotorSpeed(int m1, int m2, int m3, int m4) {
    motor1.setSpeed(speedValue);
    motor1.run(m1);
    motor2.setSpeed(speedValue);
    motor2.run(m2);
    motor3.setSpeed(speedValue);
    motor3.run(m3);
    motor4.setSpeed(speedValue);
    motor4.run(m4);
}

// Light and Horn Functions
void toggleFrontLights() {
    frontLightsOn = !frontLightsOn;
    digitalWrite(FRONT_LIGHTS_PIN, frontLightsOn ? HIGH : LOW);
}

void soundHorn() {
    digitalWrite(HORN_PIN, HIGH);
    delay(200);  // Horn sounds for 200ms
    digitalWrite(HORN_PIN, LOW);
}
Step 4: Testing the Car
Once you’ve uploaded the code to the Arduino, it’s time to test the Arduino Bluetooth Control Car. Pair your smartphone with the HC-05 module and use a Bluetooth terminal app to send commands.
- F – Move Forward
- B – Move Backward
- L – Turn Left
- R – Turn Right
- W – Toggle Front Lights
- H – Sound Horn
Conclusion
Building an Arduino Bluetooth Control Car is an incredibly rewarding project that combines electronics, programming, and creativity. With the Arduino UNO, L293D Motor Driver, and HC-05 Bluetooth module, you can create a smart, remote-controlled car that’s both functional and fun.
Whether you’re a hobbyist or a student, this project will enhance your understanding of robotics and inspire you to take on more advanced challenges. So, grab your components, follow this guide, and start building your Arduino Bluetooth Control Car today!
For Bluetooth Related project : Download BlueBot Controller App and start your journey today!